
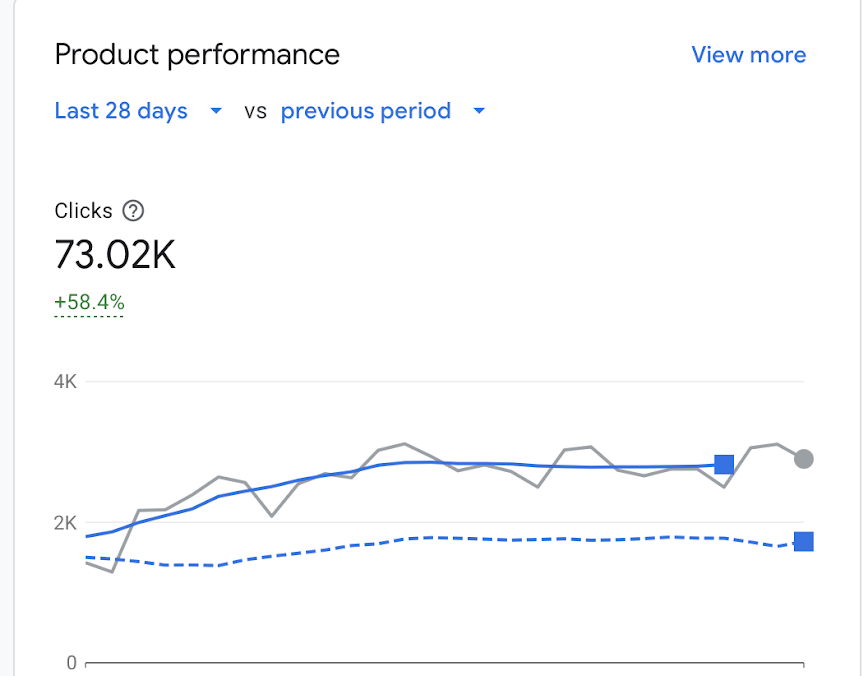
If you’re running an e-commerce store, it’s critical to upload all your products to Google Merchant Centre. Firstly, it allows you to run the best campaign type for e-commerce sales, which is Google Shopping. Secondly, you get access to free listings – your products can get a surprising amount of free traffic from organic shopping placements.
There’s literally no reason not to do it.
In this post, I’ll go over in detail all the different ways you can add your products to Merchant Centre, either manually or using scripts and automation. So let’s get into it.
Manual Product Upload
Firstly, let’s go over how you would do this manually. This generally is not recommended. You want up-to-date product details, prices, and stock, but if you’re only selling a handful of products and don’t want to jump through the hoops of automating it, let’s go through how to add a product manually in Merchant Centre.
Step-by-Step Manual Process
- Go into Merchant Centre and configure your account
- Go through the basic setup process which includes verifying ownership of your website
- Navigate to the “Products” section from the left sidebar
- Look for the “+” button to add a new product
- Select the “one by one” option which allows you to manually create products in your account
When adding a product manually, you’ll see a form with several fields to complete:
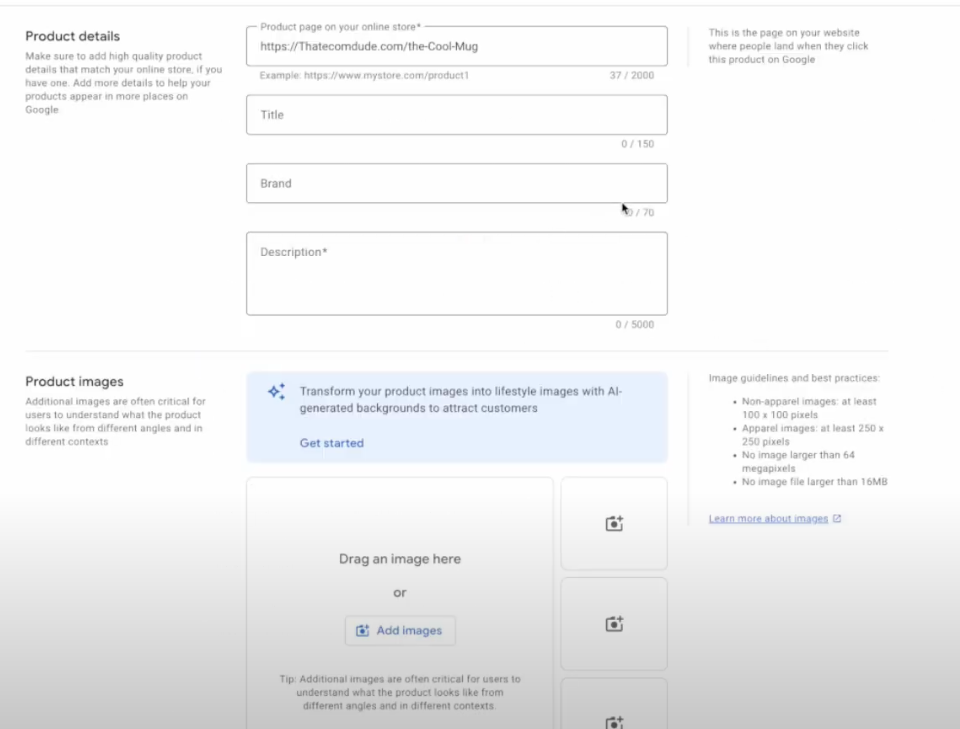
- Product URL: Enter the link to the product page on your website
- Title: Create a descriptive title for your product (this will be visible to customers)
- Description: Add a detailed product description
- Image URL: Add the link to your product image
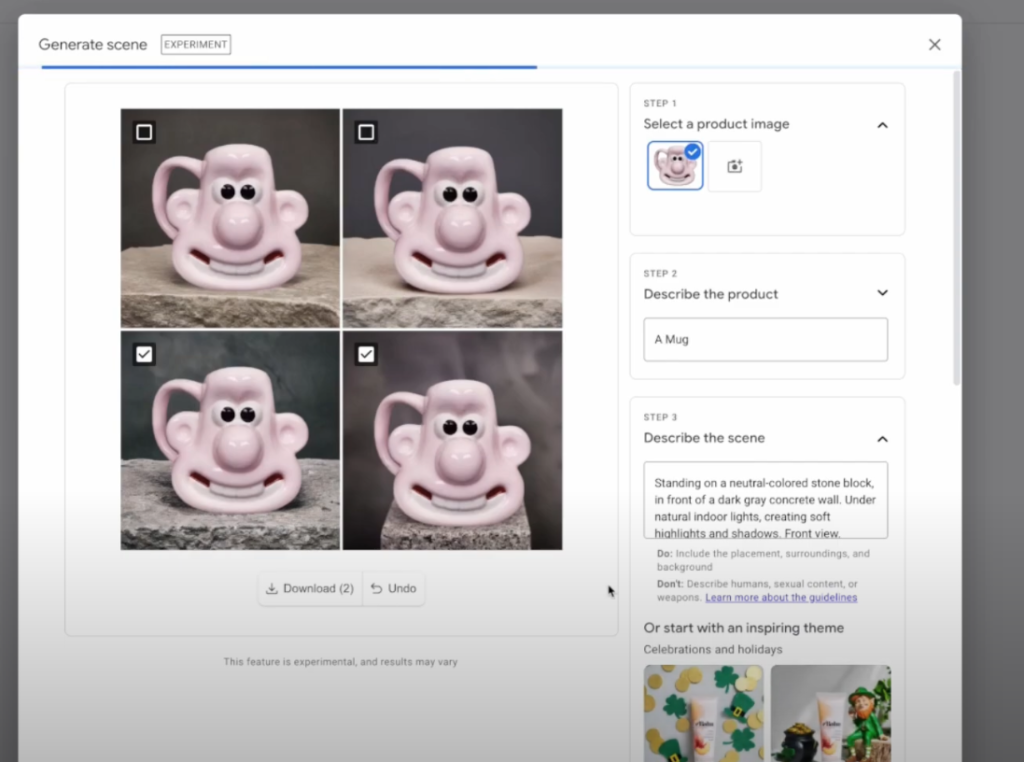
After adding an image, google will prompt you with their AI image generation, and you can use Google’s AI magic to generate lifestyle images for the products – and hey, you can even download them and use them outside of Google.
Look for the “Generate additional images” option after adding your main product image. This tool creates various lifestyle and contextual images that can make your product listings more attractive.
Important notes about uploading products. You want your main image to follow Googles guidelines, this image should have a white background, contain no watermarks or extra labels such as “sale”.
After this, you need to fill in some more detailed product information:
- Category: Select the most appropriate Google product category
- Product type: Your own categorization system (can match your website structure)
- SKU: Your unique identifier for inventory management
- GTIN/Barcode: You will need to give it some sort of barcode number (UPC, EAN, JAN, etc.)
- Brand: The manufacturer or brand name
- Condition: New, used, refurbished, etc.
- Availability: In stock, out of stock, preorder
- Price: Your selling price with currency
- Sale price (if applicable): Promotional pricing with date range
Your products can be rejected for not having a GTIN number, so make sure you have this information for each product. If your products genuinely don’t have manufacturer-assigned GTINs, you’ll need to apply for GTIN exemption through Merchant Centre.
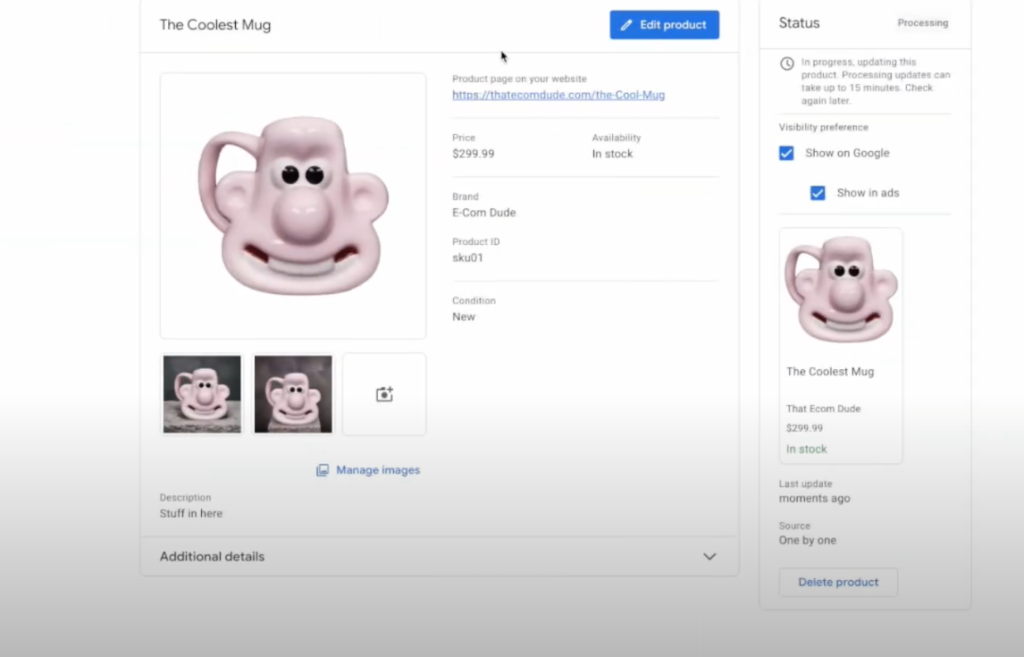
And that’s it – once all fields are completed, we publish our product and it will be reviewed by Google bots. You’ll see a status indicator showing whether your product is pending review, approved, or disapproved. This method definitely works, but if you have 100 products, it’s hard to imagine doing all this work manually.
Using a Feed File
That’s why we don’t do that. We can use something called a feed file, which will be a sort of middleman. We have a website in WordPress or a bespoke custom website with its own systems, and what we’ll do is have those websites spit out the product database into a file that Google Merchant Centre can read. This file can be on Google Drive, it can be a Google Sheet, or it can be hosted in a secret link on your site – Google will grab it and update your products every day, mirroring any changes you made on the backend.
WordPress Method with WooCommerce
Let’s do that using WordPress. Let’s go to our WooCommerce site and download this free plugin called “WooCommerce Product Feed Manager” (or similar plugin) – it will automatically generate and update feed files for you.
Here’s the detailed process:
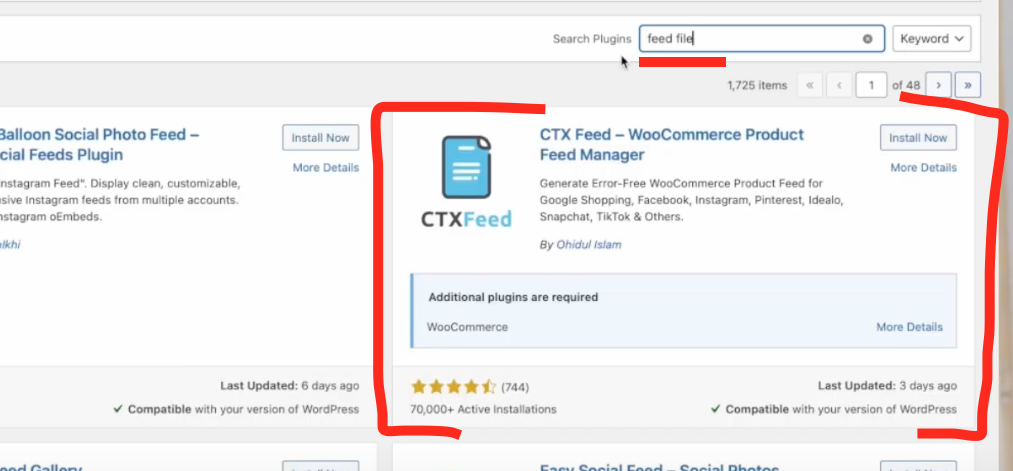
- Go to your WordPress admin dashboard
- Navigate to Plugins > Add New
- Search for “Feed file” and find CTX Feed
- Click “Install Now” and then “Activate”
- You should now see a new menu item in your dashboard for the feed manager
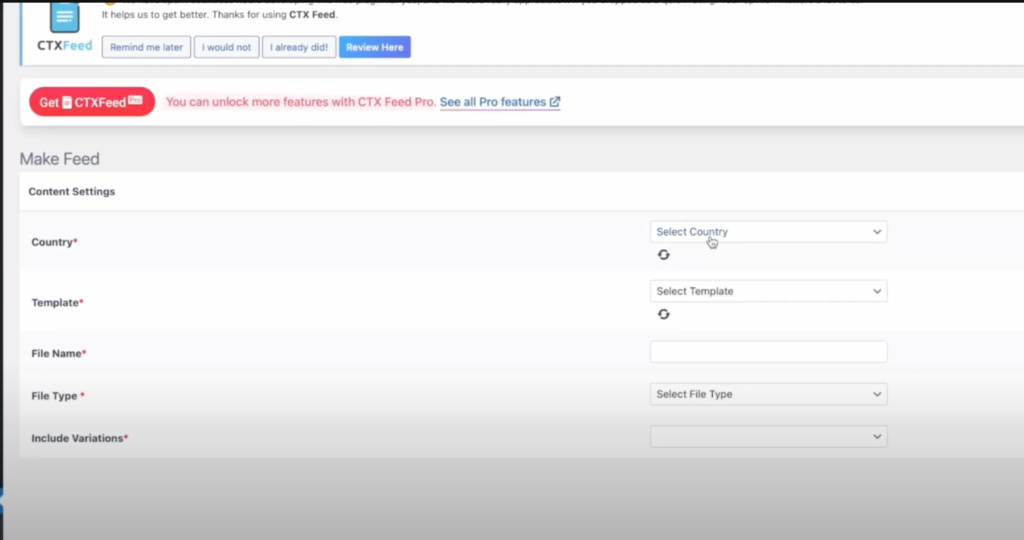
Download it and navigate to the “make feed” or “create feed” section. Here we can make our feed:
- Feed Configuration:
- Select your target countries from the dropdown (you can select multiple if selling internationally)
- Select Google Shopping as the template/channel
- Give your feed a descriptive name like “Google Shopping Feed – US”
- Set the file format (XML is usually recommended for Google)
- Configure update frequency (daily is typical)
Now we scroll down to the attributes section. There’s a lot of options to review, and you should actually spend a little bit of time here testing what works for you and what doesn’t, depending on your setup.
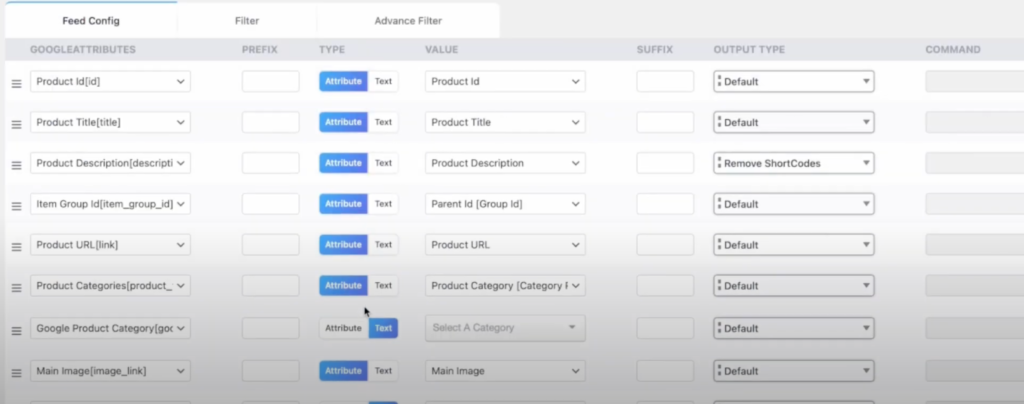
Important Attribute Settings:
- ID: Usually mapped to your product SKU or ID
- Title: You might want to use a formula that combines product name + brand + key attributes
- Description: Map to your product description field
- Link: Your product URL
- Image link: Your main product image
- Additional image link: Secondary product images
- Availability: Map to your stock status
- Price: Your regular price field
- Sale price: Your sale price with effective dates
- GTIN: Map to your barcode field
- MPN: Manufacturer part number if available
- Brand: Map to your product brand field
- Google product category: Select appropriate categories
- Shipping: Configure based on your shipping settings
For example, it’s very common to have shortcodes in your description that, if not removed, would make the description on Google listing non-sensical. So we want to remove those. Luckily, this plugin does it automatically, but it won’t do everything automatically. You might need to create custom field mappings or use the plugin’s filtering options to clean up certain data.
Once you’re happy with the settings, you can run the feed file creation, and at the top, you’ll get a link. If you click on it, it links to a page full of gibberish numbers and XML code, but that’s exactly what Google wants, so let’s give it to them.
The link will look something like: https://yourdomain.com/wp-content/uploads/woo-feed/google-shopping-feed.xml or it might be a specially generated endpoint like https://yourdomain.com/feed/google-shopping/.
Uploading Your Feed to Merchant Centre
There are 2 easy ways to upload this file:
Method 1: Schedule Regular Fetches
- Go to Google Merchant Centre
- Navigate to “Products” > “Feeds”
- Click the “+” button to add a new feed
- Select your country and language
- Choose “Scheduled fetch” as the input method
- Enter the feed URL from your WordPress plugin
- Set a fetch frequency (daily is recommended)
- Configure fetch time (ideally during low-traffic hours)
- Save your settings
Google will then download this feed file on the schedule you set, and you can also set up a schedule for the plugin to update this feed at your end. This creates a fully automated system where your WordPress site generates an updated feed and Google fetches it regularly.
Method 2: Manual Upload for Testing
- From your WordPress feed plugin, download the XML file
- Go to Google Merchant Centre
- Navigate to “Products” > “Feeds”
- Click the “+” button to add a new feed
- Select your country and language
- Choose “Upload” as the input method
- Upload the XML file you downloaded
- Save your settings
It won’t automatically download updates, but it’s suitable for testing your setup and seeing if your products will import correctly. You can check for any errors or warnings before setting up the scheduled fetch.
Other Platforms
Wix Integration If you’re using Wix, the process is exactly the same as with WordPress, but you have less control. Here’s how it works:
- Go to your Wix dashboard
- Navigate to “Marketing & SEO” > “Marketing Integrations”
- Find and select “Google Merchant Centre”
- Click “Connect”
- Follow the authorization steps
- Once connected, Wix will automatically generate a feed URL
- This URL is then automatically provided to Google Merchant Centre
Wix will basically spit out a link which you feed right into Merchant Centre. The main limitation is that you have fewer options for customizing field mappings and product data transformations compared to WordPress plugins.
Squarespace and Shopify For Squarespace and Shopify, the process is basically automatic:
Shopify:
- Go to your Shopify admin
- Navigate to “Sales channels”
- Click the “+” button to add a sales channel
- Find and add “Google channel”
- Follow the setup process to connect your Shopify store to Google Merchant Centre
- Your products will be automatically synced
Squarespace:
- Go to your Squarespace dashboard
- Navigate to “Marketing” > “SEO”
- Find the “Google integration” section
- Connect your Google account
- Enable product sync to Merchant Centre
- Follow the remaining prompts to complete the setup
Both platforms handle the technical aspects of feed creation and updating behind the scenes, making the process much simpler for store owners.
Google Sheets Option
One final option is setting up a Google Sheet in the correct format. This allows for easy manual edits to your Merchant Centre, if, for example, you want a completely different slate of titles for your shopping listings (which is good practice).
Setting Up a Google Sheets Feed:
- Create a new Google Sheet
- Set up columns with these exact headers (case-sensitive):
- id
- title
- description
- link
- image_link
- additional_image_link
- availability
- price
- sale_price
- google_product_category
- brand
- gtin
- mpn
- condition
- (Any other required attributes for your product type)
- Fill in your product data under each column
- Make the Google Sheet publicly accessible (File > Share > Anyone with the link can view)
- In Google Merchant Centre, go to “Products” > “Feeds”
- Click “+” to add a new feed
- Select “Google Sheets” as the input method
- Select your Google Sheet from the picker
You could have every column auto-import using plugins from WordPress, Wix, Squarespace, or Shopify to fill your prices, SKUs, quantities, and more, while you can edit titles and ensure they’re more appropriate to the Google Shopping format.
For example, you could set up a system where:
- Your e-commerce platform exports basic product data to a CSV file
- You import that CSV into Google Sheets
- You then manually enhance the titles and descriptions
- This enhanced sheet becomes your Google Shopping feed
or you can automate it. You can write a short script that would import data from that feedfile using google sheet’s app scripts.
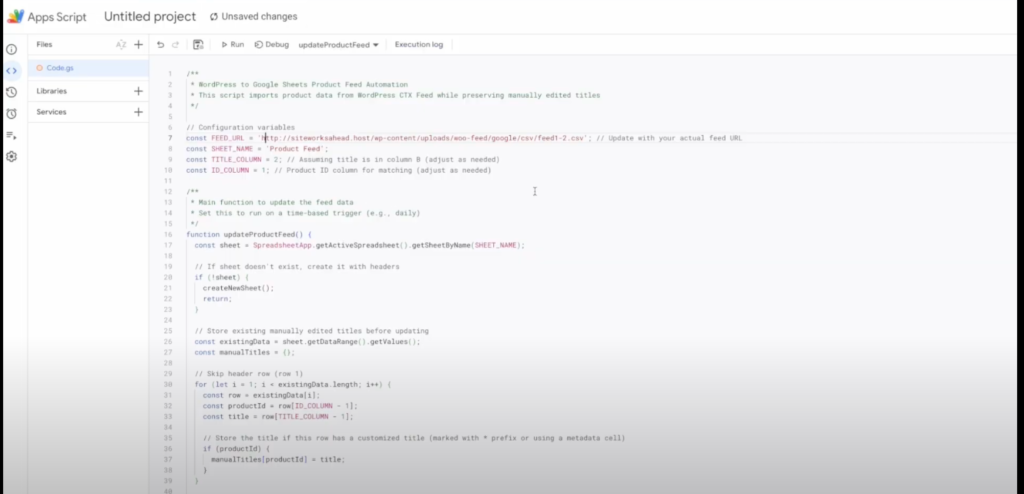
and fill every slot except the title, which you can edit.

You can trigger this script to run on a schedule, for example once a day. To update all other columns auto-magically. Like price & stock. While the titles only get changed manually.
You can then give google, the google sheets file as a feed file.
If you want the full script that does this, you can email me and get the updated code that I use for 100% free.
Generally, on your site, you want short and sleek titles like “Men’s Blue Cotton Shirt,” while on your listings, you want longer, more descriptive titles like “Men’s Blue Cotton Oxford Button-Down Shirt – Casual Long Sleeve – Machine Washable.” This is one relatively easy way to do it.
The Google Sheets method gives you a visual interface to manage your product data without needing to edit code or XML files directly. It’s particularly useful for smaller stores or for testing different product title and description formats to see what generates better click-through rates.
Troubleshooting Common Feed Issues
When setting up your feed, you might encounter some common issues:
1. Image Quality Problems
- Google requires high-quality images (at least 100 x 100 pixels, ideally 800 x 800 or larger)
- Images must be of the product only (no logos, watermarks, or text overlays)
- Check that all image URLs are accessible and not blocked by robots.txt
2. Missing Required Attributes
- GTIN/MPN/Brand requirements vary by category
- Some categories have additional required fields
- Check the “Diagnostics” tab in Merchant Centre for specific errors
3. Product Disapprovals
- Common reasons include inaccurate pricing, unavailable products, and policy violations
- Merchant Centre will provide specific reasons for disapprovals
- Fix issues promptly to maintain good account standing
- Enforcement is very variable country by country.
- Most Google Shopping features are US only while UK & EU have a more striped down version.
4. Feed Processing Errors
- XML syntax errors can prevent your entire feed from processing
- Check for special characters in your product data that might break XML format
- Validate your XML feed using online tools before submitting
Advanced Merchant Centre Tips
So yeah, those are the various ways you can import products into your Merchant Centre. There are more advanced tools and practices for really min-maxing your Google Merchant listings with custom labels, segmentation, seasonality, and more, but those are beyond the scope of this post.
Custom labels, for instance, allow you to create specific groupings for your Google Ads campaigns, letting you bid differently on high-margin products or seasonal items. Segmentation helps you organize products by performance tier, while seasonality adjustments can help you prepare for sales peaks throughout the year.
If you’re an e-commerce store looking for expert advice on everything to do with Google and Amazon ads, check out the rest of my site. We help dozens of e-commerce companies scale every month, and one critical part of what we do is juicing your Merchant Centre pipeline. Our team can help optimize your product feed, resolve disapproval issues, and create strategic shopping campaigns that maximize your return on ad spend.
Leave a Reply